This past weekend, after a month of promising cupcakes to a group of my friends, I made good on my word by whipping up a batch of spring-colored cupcakes complete with edible chocolate butterfly toppers. Even store-bought cake mixes and canned icing can be dressed up beautifully for a charming and colorful treat, with a few drops of food coloring, good technique, and some imagination.
First, I melted some milk chocolate, and used a thin cake decorating tip and a Ziplock baggie to make the outlines of my spring butterflies and hearts on a cookie sheet covered with a piece of nonstick aluminum foil. Ideally, I would have used waxed paper, but I didn't have any on hand....and the aluminum foil *did* do the job perfectly!
After I finished piping out the butterfly outlines, I popped the tray into the freezer for a few minutes, while I melted some white chocolate. After I had a clean Ziplock bag filled with the melted white chocolate, I took the sheet out, and started filling in the outlines. It is best to be generous with the chocolate at this point, to make the butterflies as solid as possible. The side facing down is the right side of the butterfly, so it is ok if the side facing up isn't perfect. Strength is more important than beauty when it comes to the backs of the bugs.
In between each new color of chocolate, I let the butterflies harden up in the freezer, to avoid the mixing of colors. See, the backs aren't very attractive, but that is fine! It is the other side of the chocolates that matters here.
After I had filled in all the spaces on my chocolates, I let them set up in the freezer, and I mixed up my cupcakes.
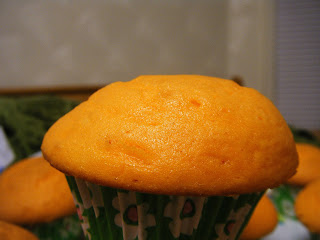
I chose a fluffy white cake batter, and dyed it sunshine orange. I chose pretty green daisy baking cups, so happy and springlike! Baking tip: to make a packaged cake mixed fluffier, don't add the egg whites until last. Mix everything else (including egg yolks if they are required), and whip it with an electric beater for a good long while. Then, mix up the egg whites *separately*, whip them until they form stiff, white peaks. Then, gently fold them into the batter with a spoon, and bake immediately. Fluffy cake guaranteed.
Also, I like the cupcakes with little fluffy mushroom tops, the kind that rise up and spill gently over the cupcake pan. However, I hate having to peel the mushroom tops off the top of the pan when the cupcakes are ready to remove. Also, I hate when the bottom half of the cupcakes stick to the papers when they are being peeled for eating. And so, to kill both of these birds with one stone: After I put the papers in the cupcake pan, but before I fill them, I lightly spray the entire thing with a canola oil baking spray. The cupcake tops rise over the pan, but do not stick, and the cupcakes come gently out of the papers when they are ready to be devoured.
I then chilled my baked cupcakes in the fridge for a few minutes, and when they were cool to the touch, iced them with Betty Crocker's Whipped Icing (whipped cream flavor), which is the smoothest spreading, prettiest store bought icing I have ever come across. (I am also in love with the Whipped Icing Strawberry Mist flavor. <3) I dyed it a lovely lavender.
Out of the freezer with the butterflies! I flipped them gently over, and they were beautiful!
I know that with a bit more practice, they'll be even nicer next time! Not bad for my first try though. :)
Then...I assembled the cupcakes:
They were swiftly devoured, attractive and delicious as they were! I think I am going to work further with this chocolate concept...Perhaps for Easter!
Thanks for reading!


These were all kinds of wonderful and delicious. ;)
ReplyDelete<3
I should have known that you'd be my first comment! Getting a blog audience is hard, thanks for the support <3
ReplyDelete