Friday, April 20, 2012

Caribbean Dinner Party: Part Two

  First of all, I apologize for the lack of pictures! I wanted more, but I am currently working with my temperamental phone's camera, and I am lucky it stays on long enough for a two minute phone call let alone a ton of pics!

  The dinner itself, however, was a success! The food was delicious, and though we had a few small emergencies involving sauce spitting from pans and aubergines that refused to cook (at first), everything turned out well in the end.

  Tip: As was proved on Wednesday night, sometimes when you plan to eat at seven 'o' clock, circumstances (and limited stove burners) cause the supper to not be ready until half past seven or later, and you may have ravenous guests on your hands...What do you do? ALWAYS have an easy appetizer ready, even if you didn't need one for your dinner. I was grateful that I had a Caribbean-style snack waiting in the wings, so as I struggled to finish my task at hand, I could ferry banana chips, chocolate covered raisins, and a mixture of tropical fruit and nuts out to the living room, and feed my company.

The menu breakdown:

Crab Cakes with a Spicy Tomato Sauce

Problem: Fresh crab meat costs $$$$$ and seeing as I had less time than I planned on that day, I didn't have the time to make them from scratch.

Solution: I made the Spicy Sauce from scratch, but when I went shopping at Adam's to pick up the produce, I went to their fishmonger and picked up eight  Adam's own crab cakes, made with real bluegrass...it cost less than buying the ingredients from scratch, and were amazingly delicious.

For the tomato sauce: Take half a sweet onion, two cloves of garlic, one chili pepper (green or red) and a can of plum tomatoes (drained), and chop them all up. Saute them in a saucepan together until they are warm and soft, then, puree them in a food processor or decent quality blender. Whala! AMAZING crab cake sauce!


Aubergines with Tomatoes and Garlic

For those of you who only speak American English, Aubergines = Eggplants.

This dish was simple: half of a sweet onion (chopped)  and a clove of garlic (minced) get sauteed with a bit of butter (NOT margarine) until they are soft, then you add to that 2 lbs of cubed eggplants...then, you add 2/3 of a cup of chicken or vegetable stock. After the eggplants are nearly soft, add 1/2 a diced red bell pepper, and 1/2 a diced green chili. Eat and enjoy!


Caribbean Corn Bread

  This dish is a savory, buttery delicious cornbread, containing sauteed onions and fresh mozzarella cheese. The result: moist deliciousness!


And now....Drum roll please! Everyone's favorite dish of the night:

Okra Fried Rice

   Everyone had second helpings of this! The secret ingredient in the okra fried rice was Chinese Five Spice. (To learn more read this article http://en.wikipedia.org/wiki/Five-spice_powder ) To try the recipe for yourself, saute half a red onion (chopped), two cloves of garlic (crushed) with 2 tbs of butter. When they are soft, add 4 oz of okra, cleaned and sliced. Let the okra cook to crisp-doneness. Then, add two cups of cooked long-grain white rice, 1/2 a chopped red chili, and 2 tbs soy sauce...Combine well. Then, add Chinese Five Spice to taste. When it is all well heated, serve it. It is REALLY, REALLY good! For any of you skeptical about okra, you should really give it a chance in this recipe.


What should the theme be next month? Indian? Moroccan? Japanese? If you have any ideas, leave me a comment, or email me at forsythiapink@gmail.com !

Thanks for reading!


Elephant Throw Pillows Update

Good Afternoon, World!

  After finally completing my elephant throw pillow, thanks to a borrowed machine (I still need a replacment part for mine!), I am here to share them with all of you.


  The two end pillows are 30" squares that were sewn together, pulled together in the middle with a button on either side, and then stiffed around the button. I love the effect that gave them! The long, rectangle pillow is 30" high and 45" wide, and has a homemade elephant applique on the front. Fusible interfacing is an amazing thing! These were so easy to make, and in the end, more affordable than buying more throw pillows for the couch.


  In the photos, the striped pillows behind the small elephant pillows are also homemade!

Coffee Table Remake: Part Two

  Enter the lacquer!

  For those of you who read Coffee Table Remake: Part One, you know that I have been refinishing an old, oval coffee table and bringing it to new heights of artistic beauty and awesomeness. For those of you who haven't read it, it is on the list of my articles ------------------------------------------------------>

  Since finishing the wood burning part, I have began the lacquering... it is a slightly tedious process, but the colors are vibrant, and the results are worth the effort! I haven't finished quite yet, but here is what i have so far :)


I still have to finish the body of the Koi fish, and the background...there will be a Part Three, so stay posted!

Monday, April 16, 2012

Coffee Table Remake: Part One

  Happy Monday! I want to show all of you what I have been laboring over this past weekend. My latest DIY project has been remaking my old coffee table, giving it some artistic flair and personality. The first step was to sand down the wooden surface, removing the old finish. Next, I sketched my design onto the table with a pencil. Then, it was time to woodburn! I used the rounded flow point in my woodburner to get the smooth, curved lines. It even signed my name with ease. Here is how the woodburning came out:


   As you can see, it is a koi fish and a crane, just like a tattoo on a table! This afternoon, I am starting the next part of the process: colorizing! Stay tuned for photos of the table as I fill in the spaces between the woodburned lines :)

Napkin Rings Update

   I've completed the Cherry Blossom Napkin Ring set (see the article about making these beauties at http://pinkforsythia.blogspot.com/2012/04/cherry-blossom-napkin-rings.html ), and have made a new set as well, inspired by Caribbean colors for my dinner party of the same theme this Wednesday (18 APR). I didn't plan on doing another set so soon, but an incredible sale this past Sunday (half-off ALL glass beads @ Micheals!!!) changed my mind quite swiftly. Here are some photos:


Saturday, April 14, 2012

Walls with Personality!

   Faced with the task of filling blank white walls with color, many of us grab a gallon of paint and a roller and go to town, transforming our boring abode into a masterpiece with character and personality. However, some of us, we unhappy few with landladies who turn their noses up to the idea of a tenant marring their fresh white expanse with *gasp* color(!!!), we have to be a bit more creative when it comes to injecting color into our lives. And so, fabrics come into play: curtains and valances, bedding and pillows, throw pillow for the couch, rugs on the floor. Wall art becomes a lot more important as well...after all, *nothing* seems quite so empty as a blank, white wall. How boring! A blank wall of any other shade is not nearly as tragic. And so, we white-walled-against-our-will color enthusiasts must find affordable, creative ways to fill the desperate void, while maintaining the integrity of our homes.  
  There are a few things we must remember! "My home is NOT a dorm room." Therefore, tacky college posters and magazine foldouts will NOT suffice as decor! "My home is NOT an office building." You can NOT decorate your entire house with a big wall calender, a motivational poster, and some assorted sticky notes! "My home is NOT a display room for an unimaginative furniture distributor who targets the lower middle class with overpriced, unoriginal, and hopelessly bland, yet surprisingly-easy-to-coordinate junk no one needs." No one but the severely dull and uncreative should have to endure bargain-bin "artwork" sets that no one really likes, and you only buy it because it is cheap and matches the white walls so well! "My home is NOT a waiting room." Ditch the boring prints that resemble dentist office decor, they are worse than the dorm-room posters!     
   Your home should scream YOU. One should be able to walk into it, and after glancing about a bit, have a somewhat decent idea about who you are. What makes you happy? What completes you? What makes you feel the way that you want to feel? THOSE are the things that should be in your home. And if you get a bit creative with the decorating, you can do it with affordable ease. Remember, it doesn't have to be completed overnight! Decorating your home is a lifetime experience. It is fluid, you change things up, add new pieces, take some away. Enjoy the process, and most importantly, turn your space into a home you can enjoy. Adding wall art, whether it be an interesting painting, a funky clock, or a collage of personal photos, adds depth, color, and personality to a home of any size. 

Caribbean Dinner Party : Part One

 The first step in planning a dinner party is deciding who to invite and when. That part was simple for this one: each month, my husband and I have my parents over our apartment for a relaxing dinner featuring a meal from an international location. For example, last month, about a week before I started this blog, I made a meal from Tuscany, featuring a lovely lemon-garlic chicken with white-wine sauce, Asparagus a la Tuscany, and beautiful roasted squash. I made simple appetizers featuring homemade pesto and fresh mozzarella cheese. My mom provided a peach and brown sugar cheesecake for dessert. So, this Wednesday, April 18th, I am going to be cooking for them again, April's theme being Caribbean cooking.

  The next step is planning a menu. Surfing the Internet, or perusing cookbooks for ideas on what you want to cook. After a few days of musing on the subject of Caribbean cookery, I decided on a menu.

Caribbean Crab Cakes
Okra Fried Rice
Aubergines with Tomatoes and Garlic
Caribbean Cornbread

In Caribbean Dinner Part: Part Two, I am going to be searching for ingredients at local shops, and researching a tropical drink to serve for the occasion!

Cherry Blossom Napkin Rings

   Seeing as I still cannot do major sewing, I am forging ahead with other projects....so Last night, I went to Micheal's and bought a selection of clearance beads for my latest project: beaded napkin rings. I think napkin rings are really underutilized nowadays, and I want to show how they can be a lovely addition to a set table. The Cherry Blossom napkin rings are half of a set of four that are Asian-inspired and have a green color scheme. The other two in the set are to have pewter dancing fans as the main charm, incredibly adorable. I hope to have a few different sets with different color schemes completed by the end of the month, and I'll post pictures as I make them.

   Even for people who prefer not to use cloth napkins,  (I like the idea of cloth napkins at actual dinner parties...at least ones that have a smaller group of people...I mean, the LAUNDRY inherent in using cloth napkins for a dinner of fifty boggles my mind...especially since apartment living currently force me to utilize the local Laundromat, and I prefer not to have to go anymore that I have to.) napkin rings are still an option! You can have regular napkins available, and a "decorative" cloth set laid out on the plates with the pretty rings (the first impression your guests get is the set table!), or, there are even "cloth-like" disposable napkins available that you could put the rings on.

  The beauty of hand-beading your own napkin rings is the creative flexibility. Glass beads come in myriad colors and shapes, and there is an endless selection of charms and decorative additions available at any decent crafting store (such as Micheal's Crafts). I bought a few types of beads, two kinds of charms, and a roll of 20 gauge wire (thicker jewelry making wire) that was thin enough to string the beads, but thick enough to hold its shape.


  It may take awhile to find a design you like, playing around with the beads an wire. I recommend having a pair of pliers handy for snipping the wire and bending the ends closed, makes a world of difference. I used the round handle of a hammer as the circumference guide for my rings, so they will all be uniform. Find a cylindrical object about the width of a napkin ring to use as a guide...having something the wrap the wire around to see how much I'd need was very helpful.

   After a few designs, I found one I loved for the Cherry Blossom rings, and I made two of them. I scrapped a few pieces of wire along the way, finding the design I was most happy with, so don't worry if you have to as well. It is part of the creative process.


  I really love the green beads with the silver netting, they are very elegant, and have a lot of color and texture to provide. Smaller crystal and clear glass beads are between them in the design, and small crystal beads were strung through the loop in the charm to keep it in place and facing upward.


I feel inspired enough by the success of these simple, yet lovely Cherry-blossom napkin rings to plunge ahead and create a few more! Keep tuned in for updated pictures once the other half of the set is finished :)

Wednesday, April 11, 2012

Elephant Throw Pillows and Chocolate Art Update

Hello!
 
   Lately I have been in the process of making throw pillows for my massive couches. It is, I assure you, quite a task. The latest set are made of a lovely elephant print corduroy, which I procured at an amazing sale. There are to be two square pillows, each thirty inches across and cinches together in the middles with fabric-coordinating buttons, and a larger rectangle pillow (forty-five inches long), on which I have appliqued and embroidered a large elephant out of a lovely pink sateen.


Because the nature of the applique material is to pull and get runs in the fabric quite easily, I first covered it with a fusible vinyl, turning the delicate material into a beautiful, yet durable piece of stain resistant vinyl. Due to a part that needs replacing in my sewing machine, my elephant throw pillow project is at a temporary standstill, but pictures will be uploaded of the completed trifecta, posthaste.

Hearkening back to my "Butterfly Cupcakes" article, I have gone further with the chocolate cake topper idea, and made quite a lovely cake topper for a round Easter cake. Here is the pattern I drew up for it:


Of course, before starting the chocolate part, I flipped the picture around, to get a mirror image of the words, so in the end they wouldn't be backward on the cake. Also, this time I used parchment paper, which is transparent enough to allow you to see your drawing through it, and is incredibly nonstick as well.


So, hopefully besides fixing my sewing machine and cleaning up the Easter grass from around my apartment, I can create something fantastic to post about soon! Thanks for reading :)

P.S. I am planning a Caribbean dinner party for four! Stay tuned for updates on recipe selections and photos!

Wednesday, April 4, 2012

Plans for this week

Hello! I just wanted to send out and update on my creative endeavors this week. Today, and tomorrow, I am going to be sewing up a storm, the end product of this will (hopefully) be a new dress, kitchen appliance covers and two fabulous throw pillows. Also, I am going to be throwing together some spicy Korean-style BBQ chicken, (which is *worth* trying!), and planning a small dinner party to be held sometime this month. I just picked up some adorable white ceramic ramekins, and want to put them to good use...so I will be choosing from recipes that will utilize them. Also, expanding on my "Butterfly Cupcakes" experiment, I want to make a topper for a gorgeous Easter cake. Please keep an eye out for these upcoming articles, and thanks for reading!

Monday, April 2, 2012

Butterfly Cupcakes

This past weekend, after a month of promising cupcakes to a group of my friends, I made good on my word by whipping up a batch of spring-colored cupcakes complete with edible chocolate butterfly toppers. Even store-bought cake mixes and canned icing can be dressed up beautifully for a charming and colorful treat, with a few drops of food coloring, good technique, and some imagination.

First, I melted some milk chocolate, and used a thin cake decorating tip and a Ziplock baggie to make the outlines of my spring butterflies and hearts on a cookie sheet covered with a piece of nonstick aluminum foil. Ideally, I would have used waxed paper, but I didn't have any on hand....and the aluminum foil *did* do the job perfectly!


   After I finished piping out the butterfly outlines, I popped the tray into the freezer for a few minutes, while I melted some white chocolate. After I had a clean Ziplock bag filled with the melted white chocolate, I took the sheet out, and started filling in the outlines. It is best to be generous with the chocolate at this point, to make the butterflies as solid as possible. The side facing down is the right side of the butterfly, so it is ok if the side facing up isn't perfect. Strength is more important than beauty when it comes to the backs of the bugs.

  In between each new color of chocolate, I let the butterflies harden up in the freezer, to avoid the mixing of colors. See, the backs aren't very attractive, but that is fine! It is the other side of the chocolates that matters here. 


  After I had filled in all the spaces on my chocolates, I let them set up in the freezer, and I mixed up my cupcakes.


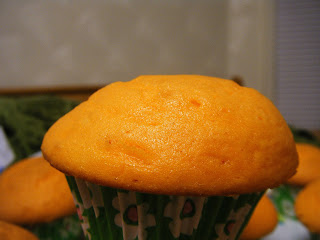
 I chose a fluffy white cake batter, and dyed it sunshine orange. I chose pretty green daisy baking cups, so happy and springlike! Baking tip: to make a packaged cake mixed fluffier, don't add the egg whites until last. Mix everything else (including egg yolks if they are required), and whip it with an electric beater for a good long while. Then, mix up the egg whites *separately*, whip them until they form stiff, white peaks. Then, gently fold them into the batter with a spoon, and bake immediately. Fluffy cake guaranteed. 

Also, I like the cupcakes with little fluffy mushroom tops, the kind that rise up and spill gently over the cupcake pan. However, I hate having to peel the mushroom tops off the top of the pan when the cupcakes are ready to remove. Also, I hate when the bottom half of the cupcakes stick to the papers when they are being peeled for eating. And so, to kill both of these birds with one stone: After I put the papers in the cupcake pan, but before I fill them, I lightly spray the entire thing with a canola oil baking spray. The cupcake tops rise over the pan, but do not stick, and the cupcakes come gently out of the papers when they are ready to be devoured.

I then chilled my baked cupcakes in the fridge for a few minutes, and when they were cool to the touch, iced them with Betty Crocker's Whipped Icing (whipped cream flavor), which is the smoothest spreading, prettiest store bought icing I have ever come across. (I am also in love with the Whipped Icing Strawberry Mist flavor. <3) I dyed it a lovely lavender.


Out of the freezer with the butterflies! I flipped them gently over, and they were beautiful!


 I know that with a bit more practice, they'll be even nicer next time! Not bad for my first try though. :)

Then...I assembled the cupcakes:


 They were swiftly devoured, attractive and delicious as they were! I think I am going to work further with this chocolate concept...Perhaps for Easter!

Thanks for reading!